
How to Make Your VAN List into a Group
You can import a saved VAN list into GetThru to create a group for your ThruText or ThruTalk campaigns. Importing a list from VAN allows you to use existing contact data without manually exporting and uploading a CSV file.
This guide explains how to prepare your VAN list, import it into GetThru, map your contact fields, and create a group.
Updates shown in this guide are Coming Soon!
TABLE OF CONTENTS
- Before Importing
- Prepare Your VAN List
- Import Your VAN List into GetThru
- After Creating Your Group
- Troubleshooting VAN Import Issues
- Additional Information About VAN Lists
Before Importing
Before importing a VAN list, make sure you've completed the following setup steps:
- Obtain your API key, following the steps in this guide: VAN Integration Setup - Step 1: Getting a VAN API Key.
- Set up your VAN integration to GetThru by following the steps in this guide: VAN Integration Setup - Step 2: Entering the API Key in GetThru.
Your VAN integration must be configured for the product (ThruText or ThruTalk) and VAN database (MyVoters or MyCampaign) you plan to use.
Prepare Your VAN List
Before importing contacts into GetThru, you need to save your VAN list in a folder that GetThru can access.
Your list must be a Saved List, not a Saved Search.
Grant GetThru Access to Your VAN Folder
GetThru needs permission to access the VAN folder containing your saved lists. You can create a new folder or grant access to an existing folder.
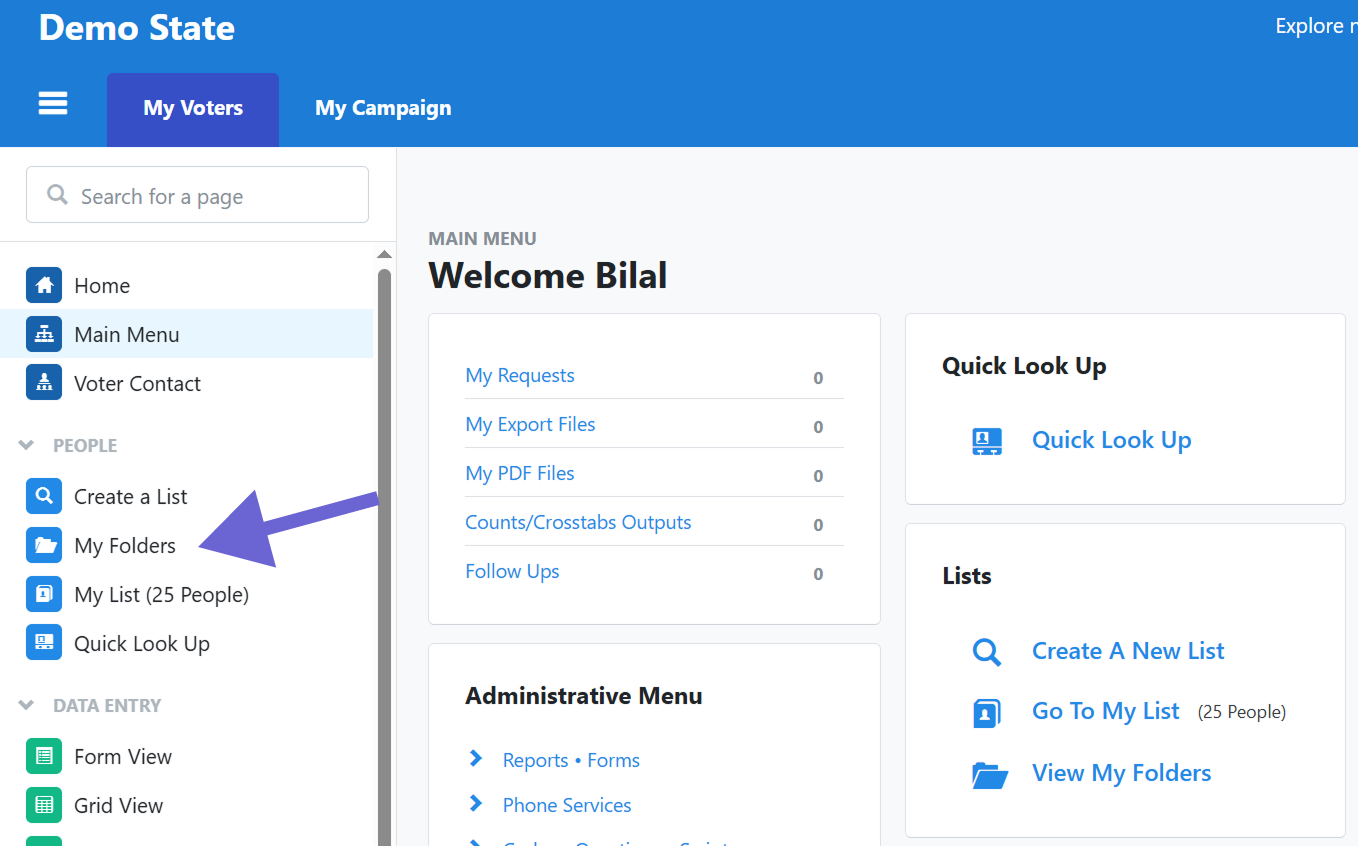
- In VAN, select My Folders from the left navigation menu.
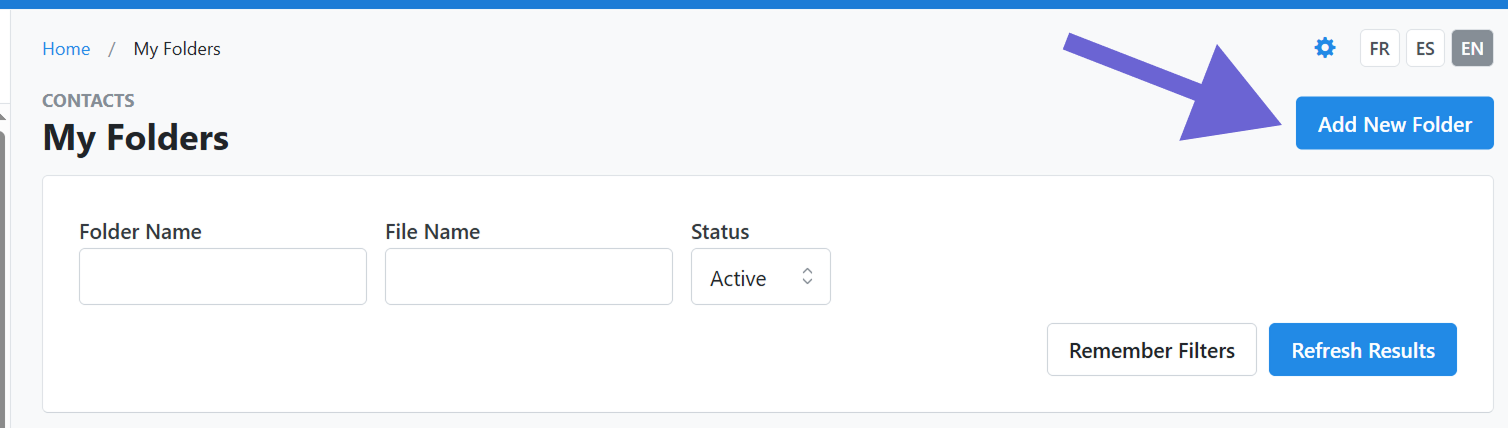
- On the My Folders page, click Add New Folder. If you're using an existing folder, open it and select Edit Folder instead.
- If you're creating a folder, enter a name. Select Allow other users to save into this folder. If available, also select Allow the API to save into this folder.
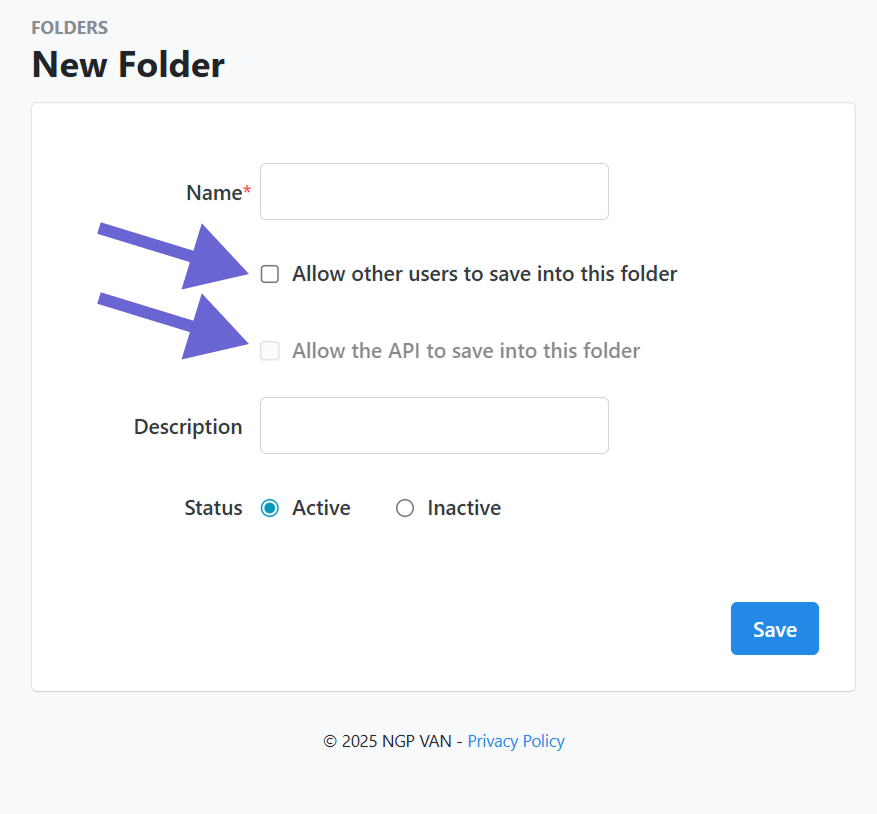
Click Save to continue.
Under User Access, select the API user associated with your GetThru integration from Users without Access, then click Add.
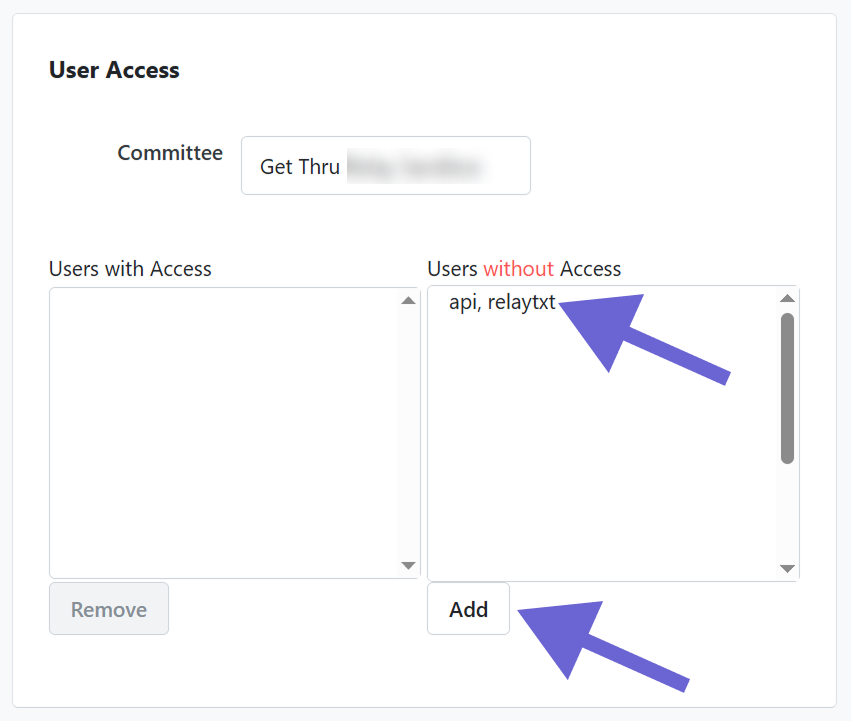 The API user should now appear under Users with Access.
Your VAN folder is now configured to allow GetThru to access saved lists.
Save Your VAN List
Once your folder is configured and you've reviewed your contacts, save your list in VAN.
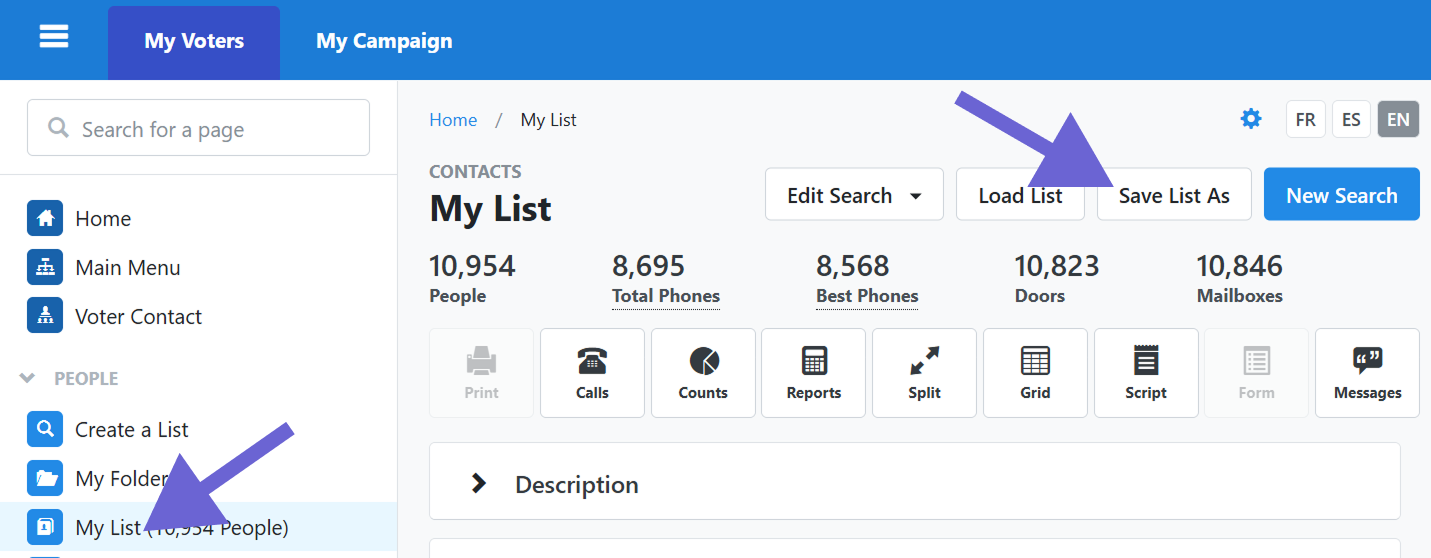
- Open the list you want to import, then click Save List As.
- Select Saved List. Under Folder, select the folder you configured for GetThru access.
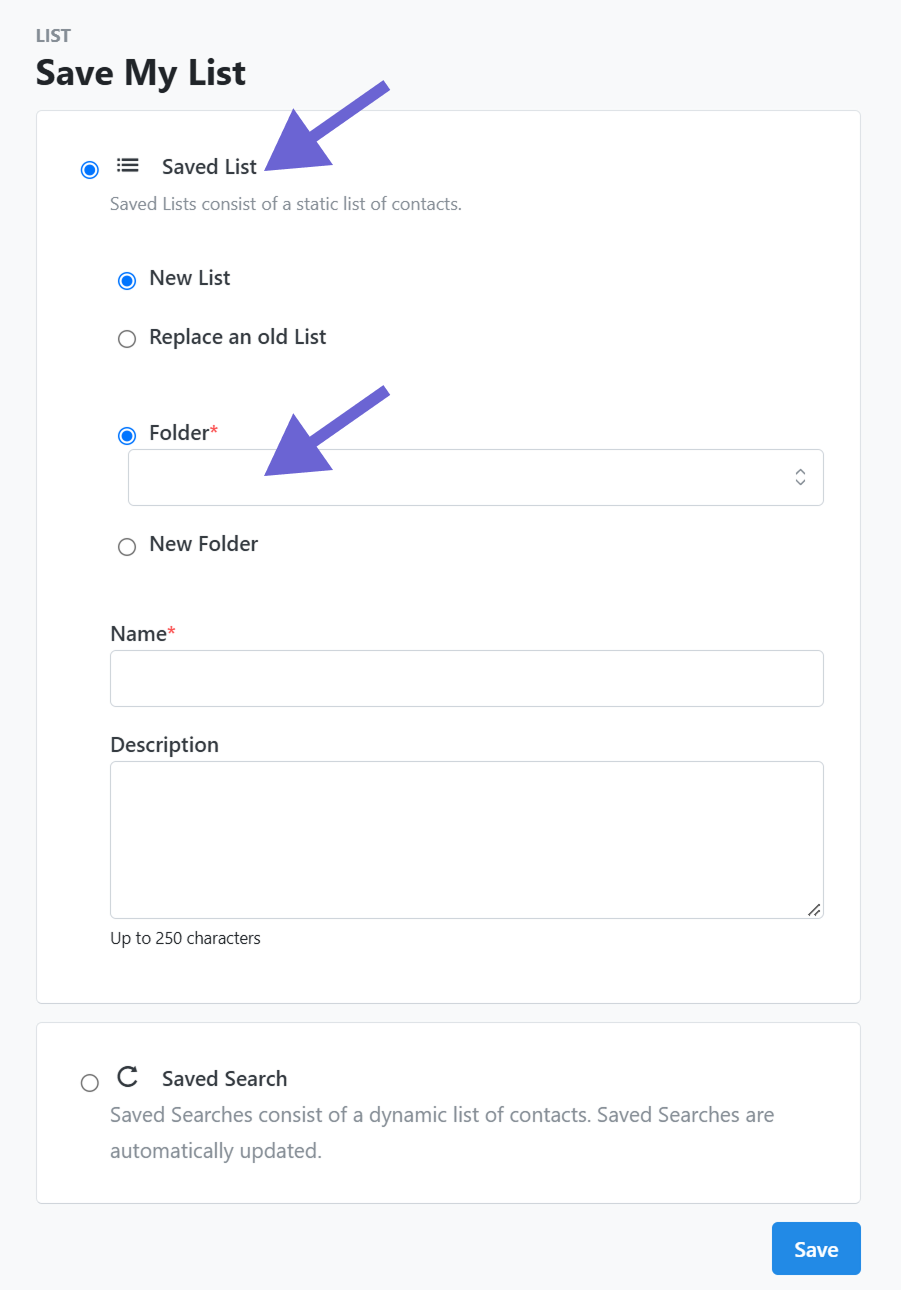
- Click Save.
Your list is now ready to import into GetThru.
Import Your VAN List into GetThru
Once you've saved your VAN list in a folder GetThru can access, you can import it directly into GetThru using the Group Upload Wizard.
The wizard will guide you through three steps: File Selection, Field Mapping, and Review.
Step 1: File Selection
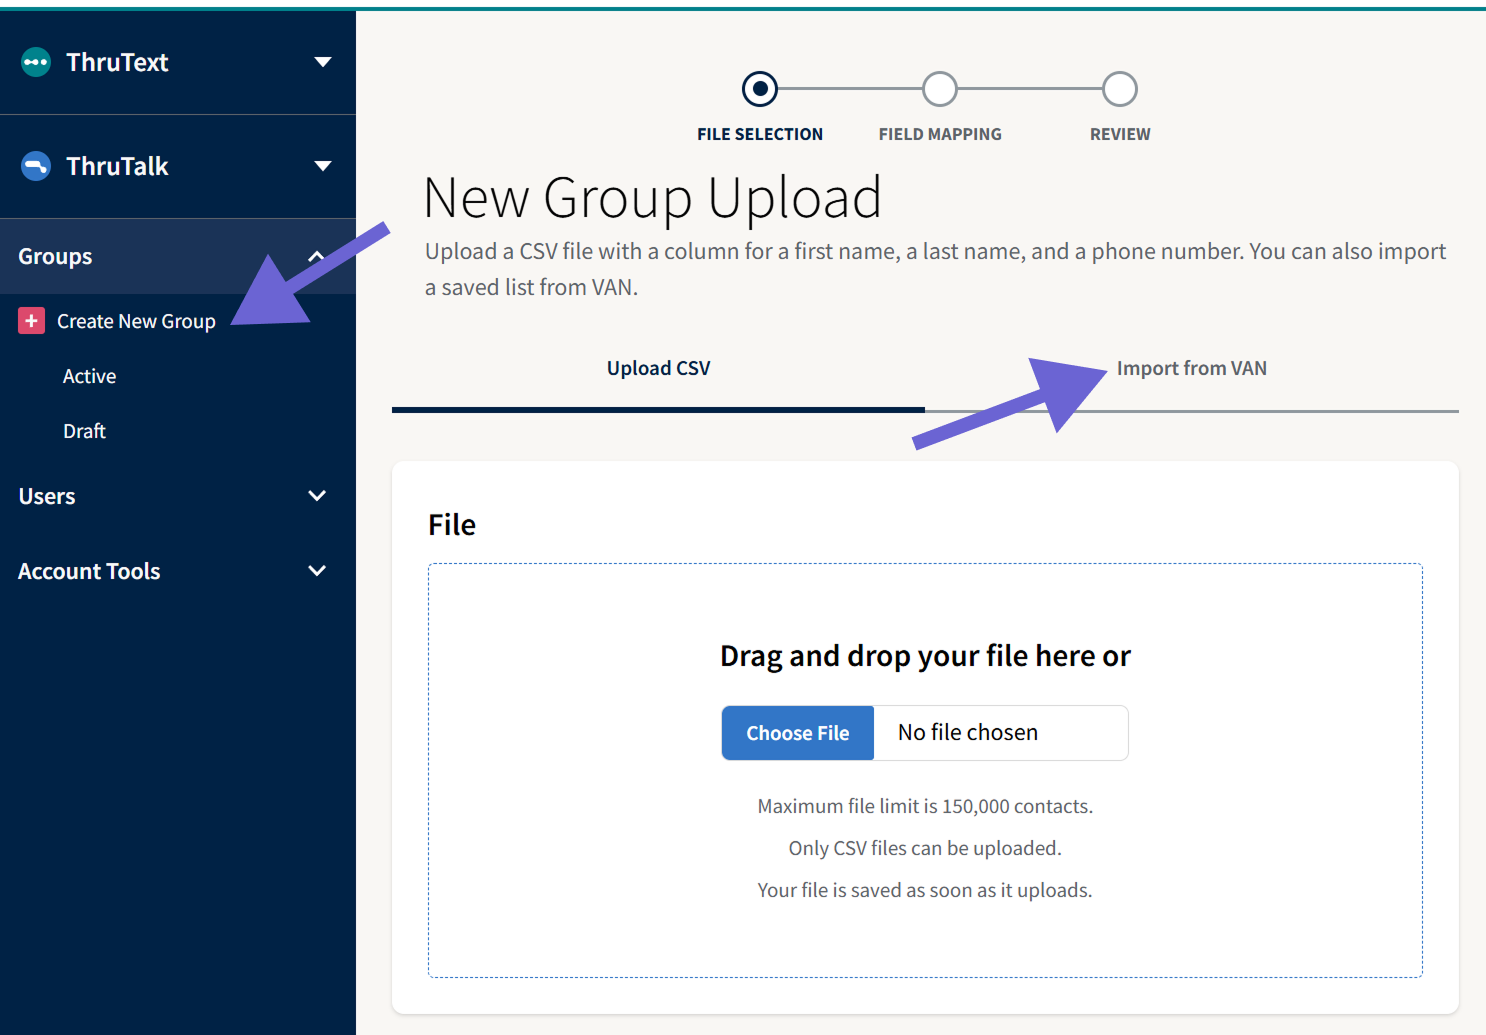
In GetThru, expand Groups in the left navigation menu and click Create New Group. On the New Group Upload page, select Import from VAN.
The Import from VAN page displays the saved lists available through your VAN integrations.
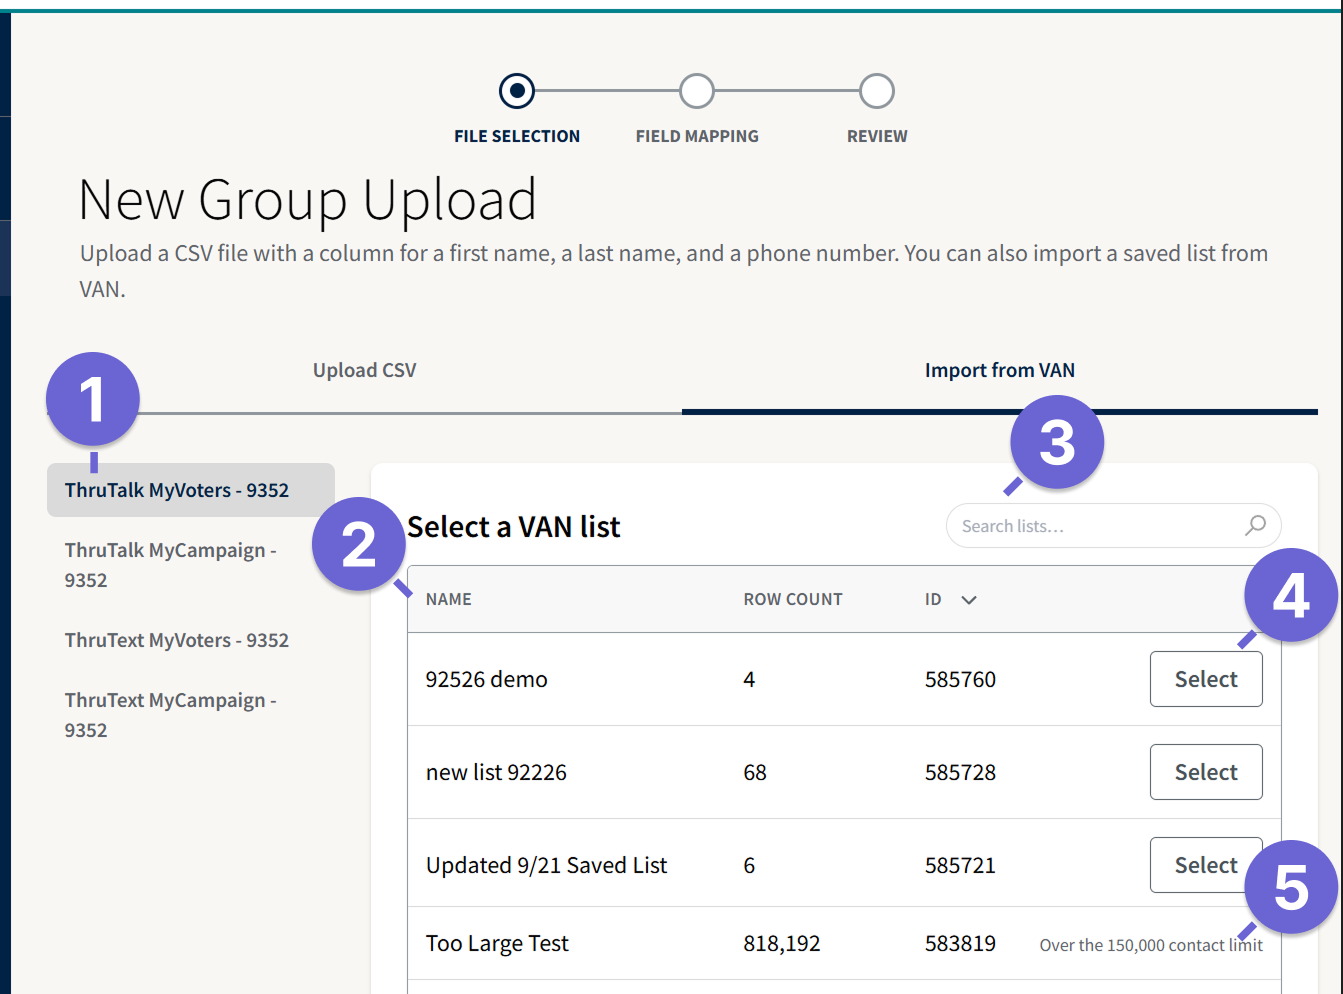
VAN Integration: Select the integration that matches your GetThru product and VAN database.
Sort: Select the Name, Row Count, or ID column headers to sort the available lists.
Search: Search your saved lists by name, description or ID.
Select a List: Click Select next to the list you want to import.
Contact Limit: Lists exceeding the 150,000-contact limit cannot be selected. If your list is too large, divide it into smaller saved lists in VAN before importing.
After selecting your list, you'll be directed to the Edit Group Import page.
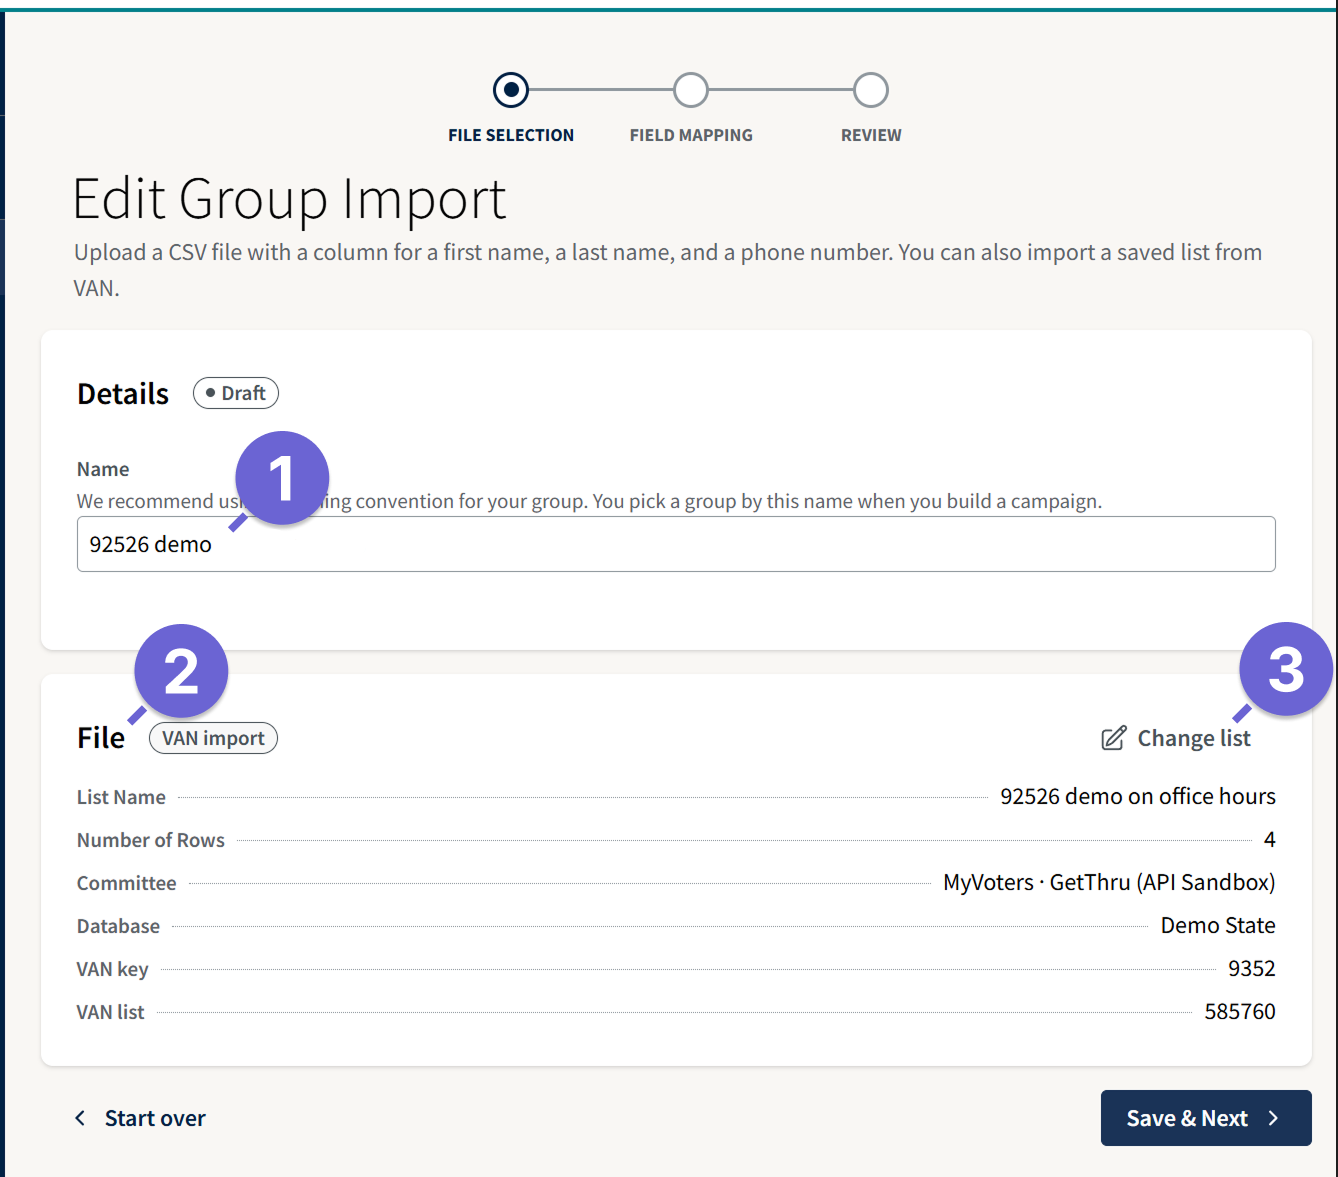
- Name: Enter a name for your group. GetThru automatically fills in the name of your VAN list, but you can change it.
- File: Under File, review the imported list details, including the list name, number of rows, and VAN database.
- Change List: Click here to choose a different list.
Once you've reviewed the list details, click Save & Next to continue to Field Mapping.
Step 2: Field Mapping
During the Field Mapping step, you'll confirm which columns from your VAN list correspond to GetThru's required and custom fields.
Required Fields
GetThru requires a first name, last name, and phone number for each contact. The wizard automatically selects columns from your VAN list, but you can change these selections if needed.
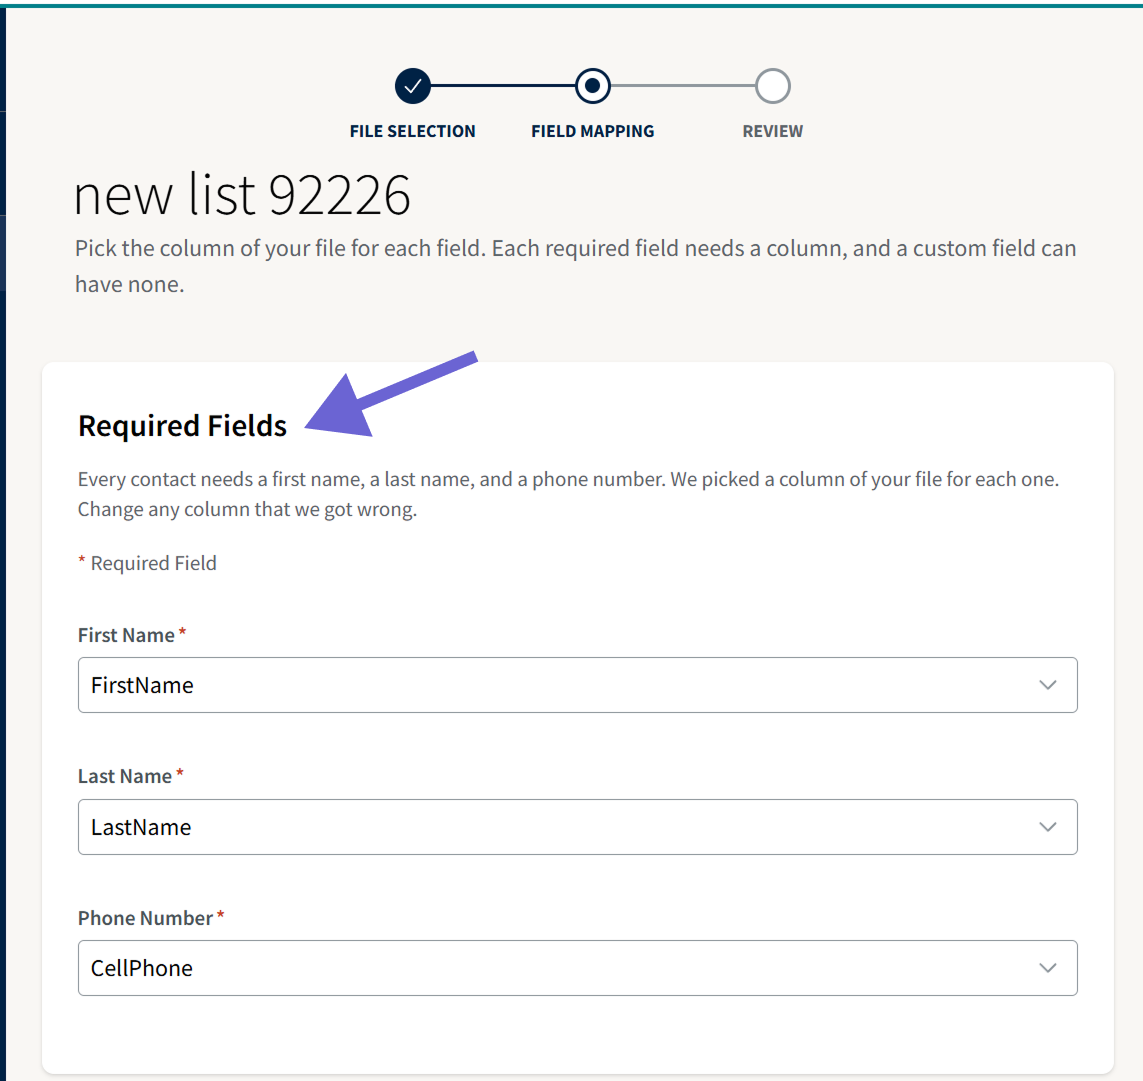
VAN lists can include multiple phone number columns, such as HomePhone, CellPhone, and WorkPhone. Click the Phone Number dropdown to view the available columns and how many cells contain data.
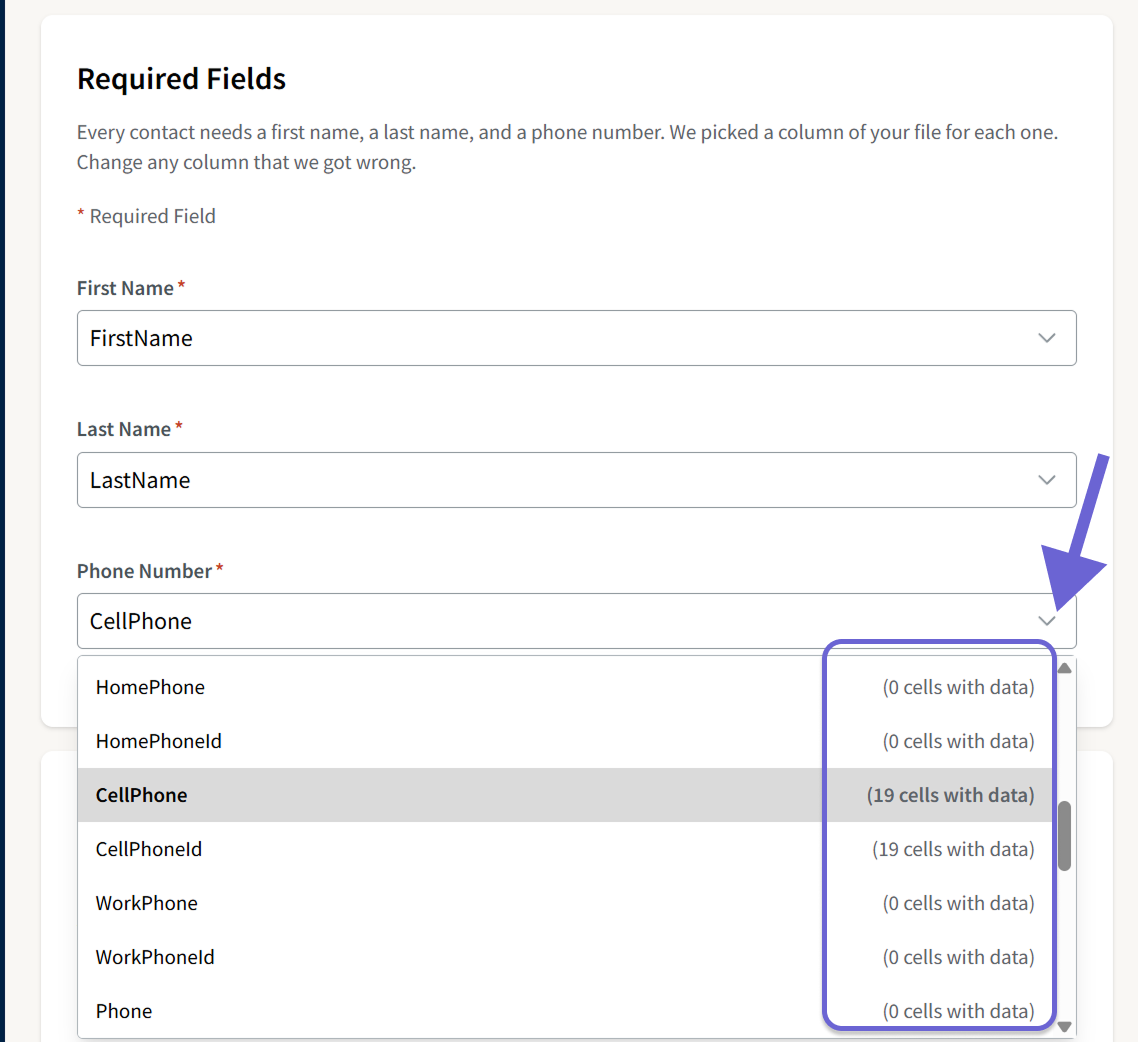
The CellPhone column often contains the most mobile phone numbers, but you should choose the column that best fits your campaign. Use the counts in the dropdown to compare available options.
The displayed counts represent cells containing data, not necessarily valid phone numbers. Contacts missing required information will be excluded when GetThru processes the group.
Custom Fields
Below the required fields, you'll find the custom fields configured in your GetThru account. Custom fields allow you to import additional contact information from VAN. Most custom fields are optional, but the correct VAN ID is necessary to sync campaign activity back to VAN.
When you import a saved VAN list, GetThru automatically maps the corresponding VAN ID field based on the selected database.
- MyVoters: VAN ID (Voter File)
- MyCampaign: VAN MyCampaign ID
These IDs allow campaign activity to sync back to the correct contact records in VAN.
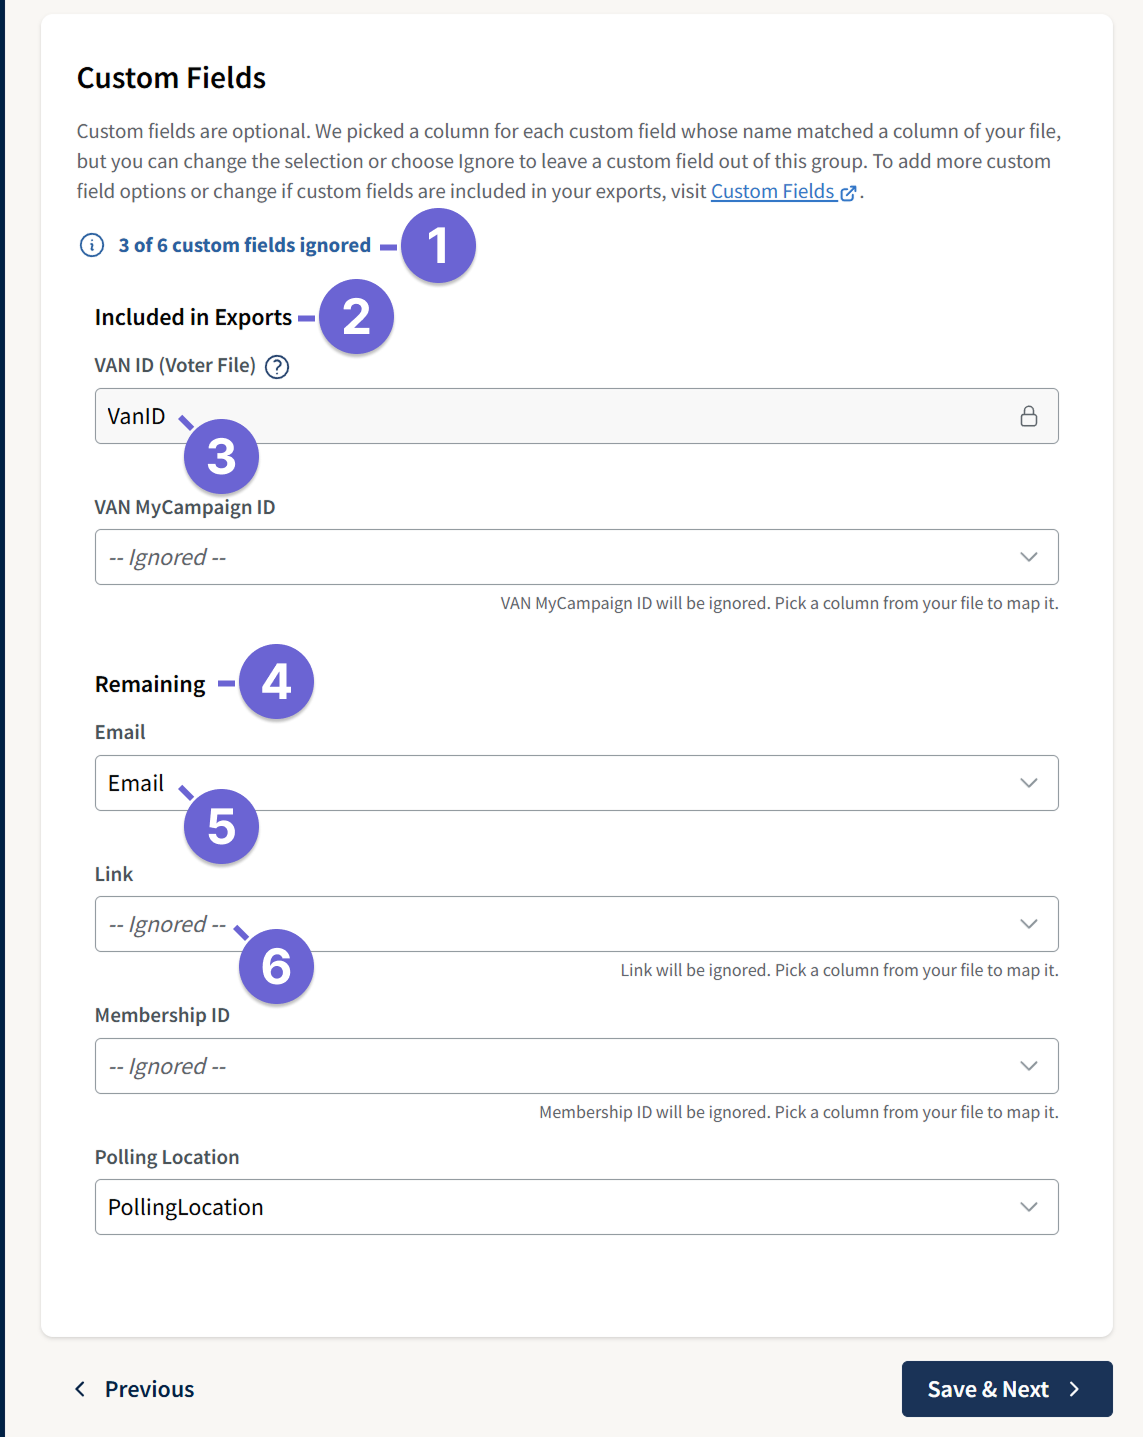
- Custom Fields Ignored: Shows how many available custom fields will not be mapped to your group.
- Included in Exports: Lists custom fields configured to appear in exports when mapped.
- VAN ID Mapping: Shows the automatically mapped VAN identifier. In this example, VAN ID (Voter File) is mapped to VanID.
- Remaining: Lists other custom fields available in your GetThru account.
- Mapped Fields: Shows fields connected to columns from your VAN list. In this example, Email is mapped to Email.
- Ignored Fields: Fields set to Ignored will not be imported into your group. Select a column from the dropdown if you want to include an available field.
In this example, the list was imported from MyVoters, so VAN ID (Voter File) is mapped, while VAN MyCampaign ID is ignored.
NOTE - Custom fields must already exist in your GetThru account before they can be mapped. To add or manage custom fields, see our guide on Custom Fields – Personalization and Integrations.
Review the remaining custom fields and adjust their mappings as needed. Once you've reviewed your custom fields, click Save & Next to continue.
Step 3: Review
Before creating your group, review the imported VAN list details and field mappings to make sure everything is correct.
The Review page shows your selected VAN list and how its columns will be mapped to GetThru fields.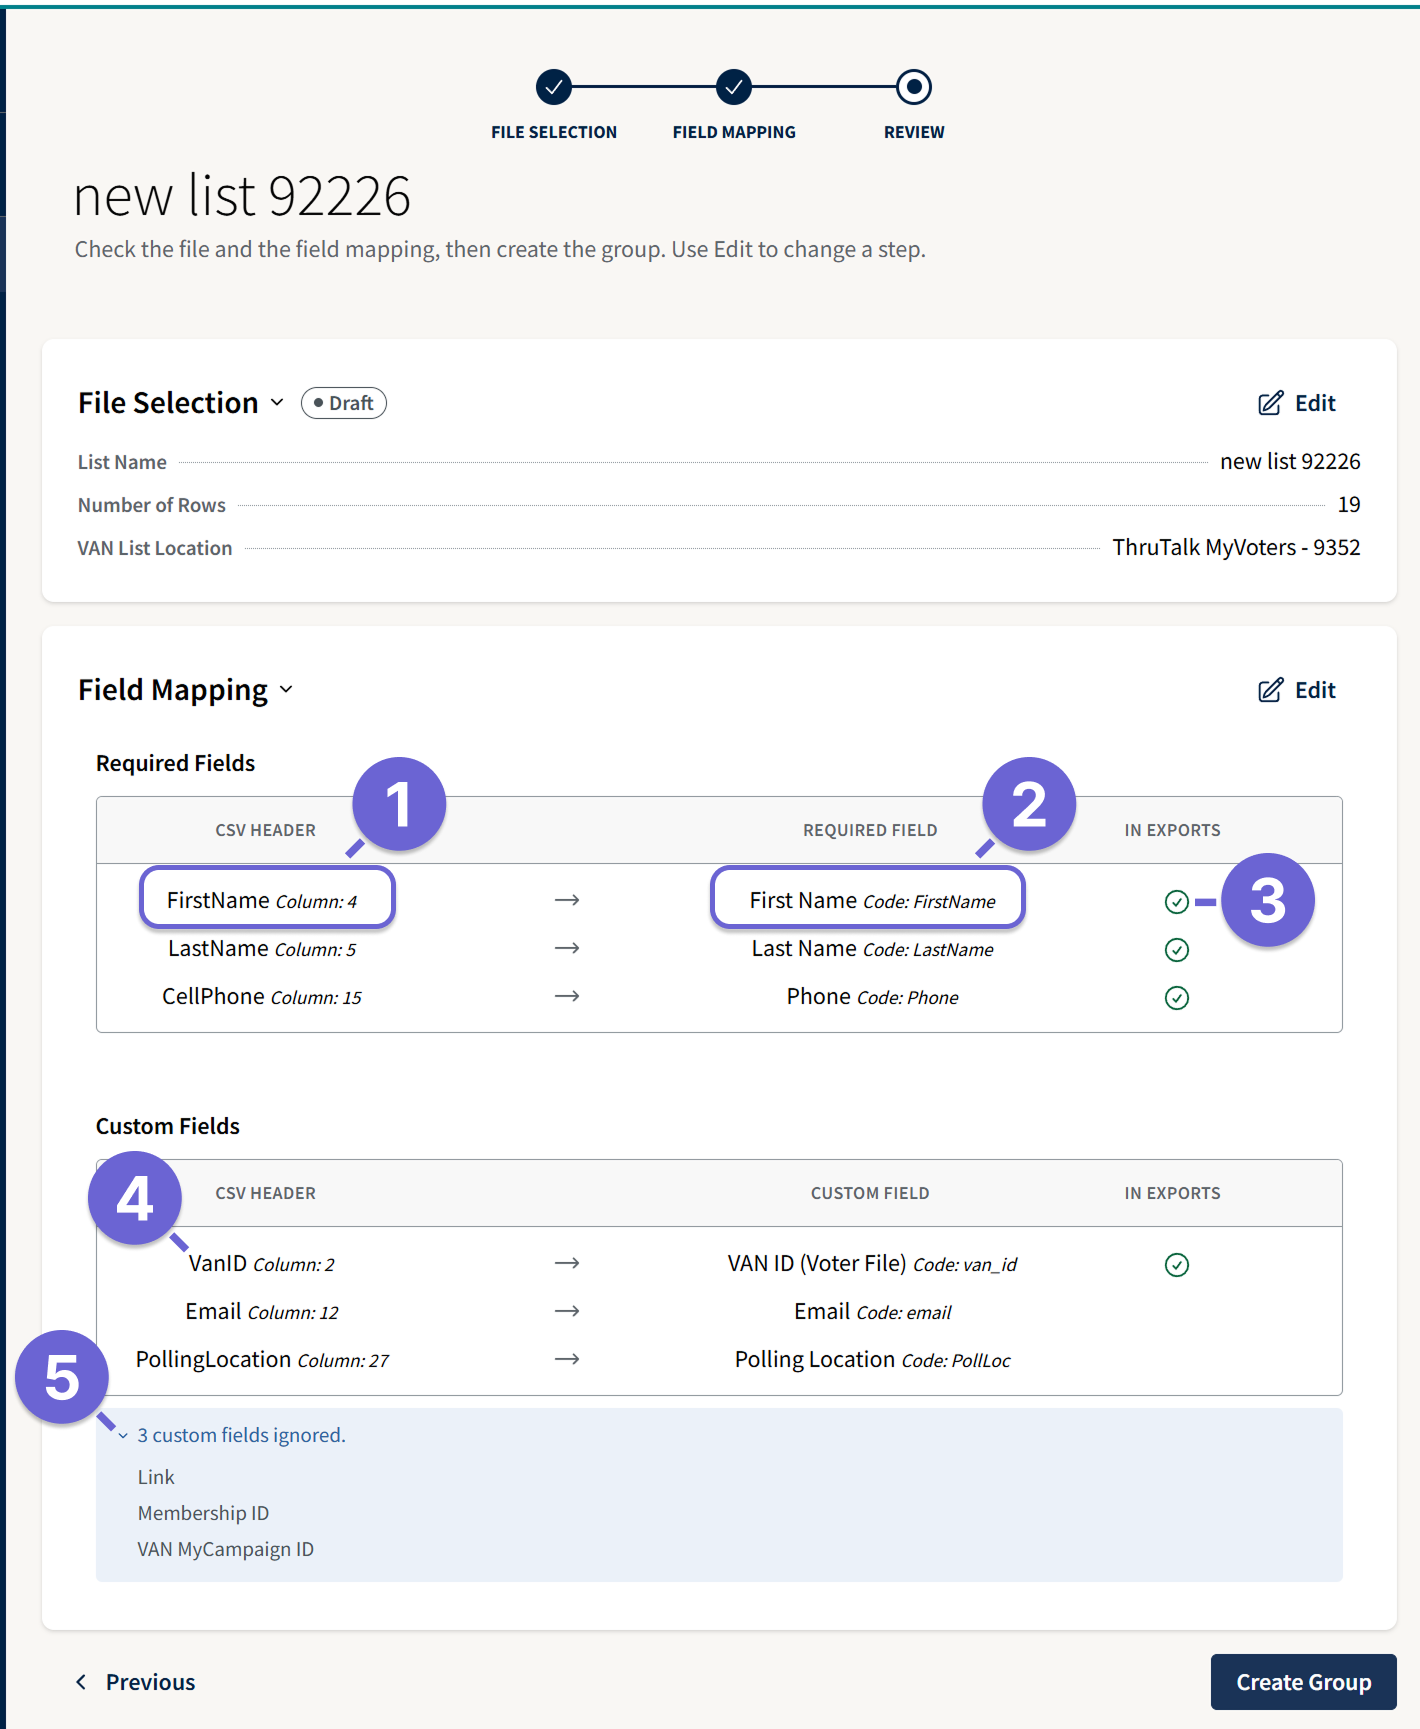
- CSV Header: Shows which column from your imported VAN list was selected.
- Required Field: Shows which GetThru field each column is mapped to.
- In Exports: A green checkmark indicates that the mapped field will be included in exports.
- Custom Fields: Shows which additional columns are mapped to your GetThru custom fields, including the VAN ID.
- Ignored Custom Fields: Lists custom fields that were not mapped and will not be imported into your group.
Confirm that the appropriate VAN ID is mapped correctly before creating your group.
If you need to make changes, click Edit to return to the corresponding step. Once you've confirmed that everything is correct, click Create Group.
After Creating Your Group
After clicking Create Group, you'll be directed to the Group Details page, where you can monitor your group's upload progress.
Your group status will appear as Uploading while GetThru processes your contacts and validates their phone numbers. Once the status changes to Active, your group is ready to use in ThruText or ThruTalk campaigns.
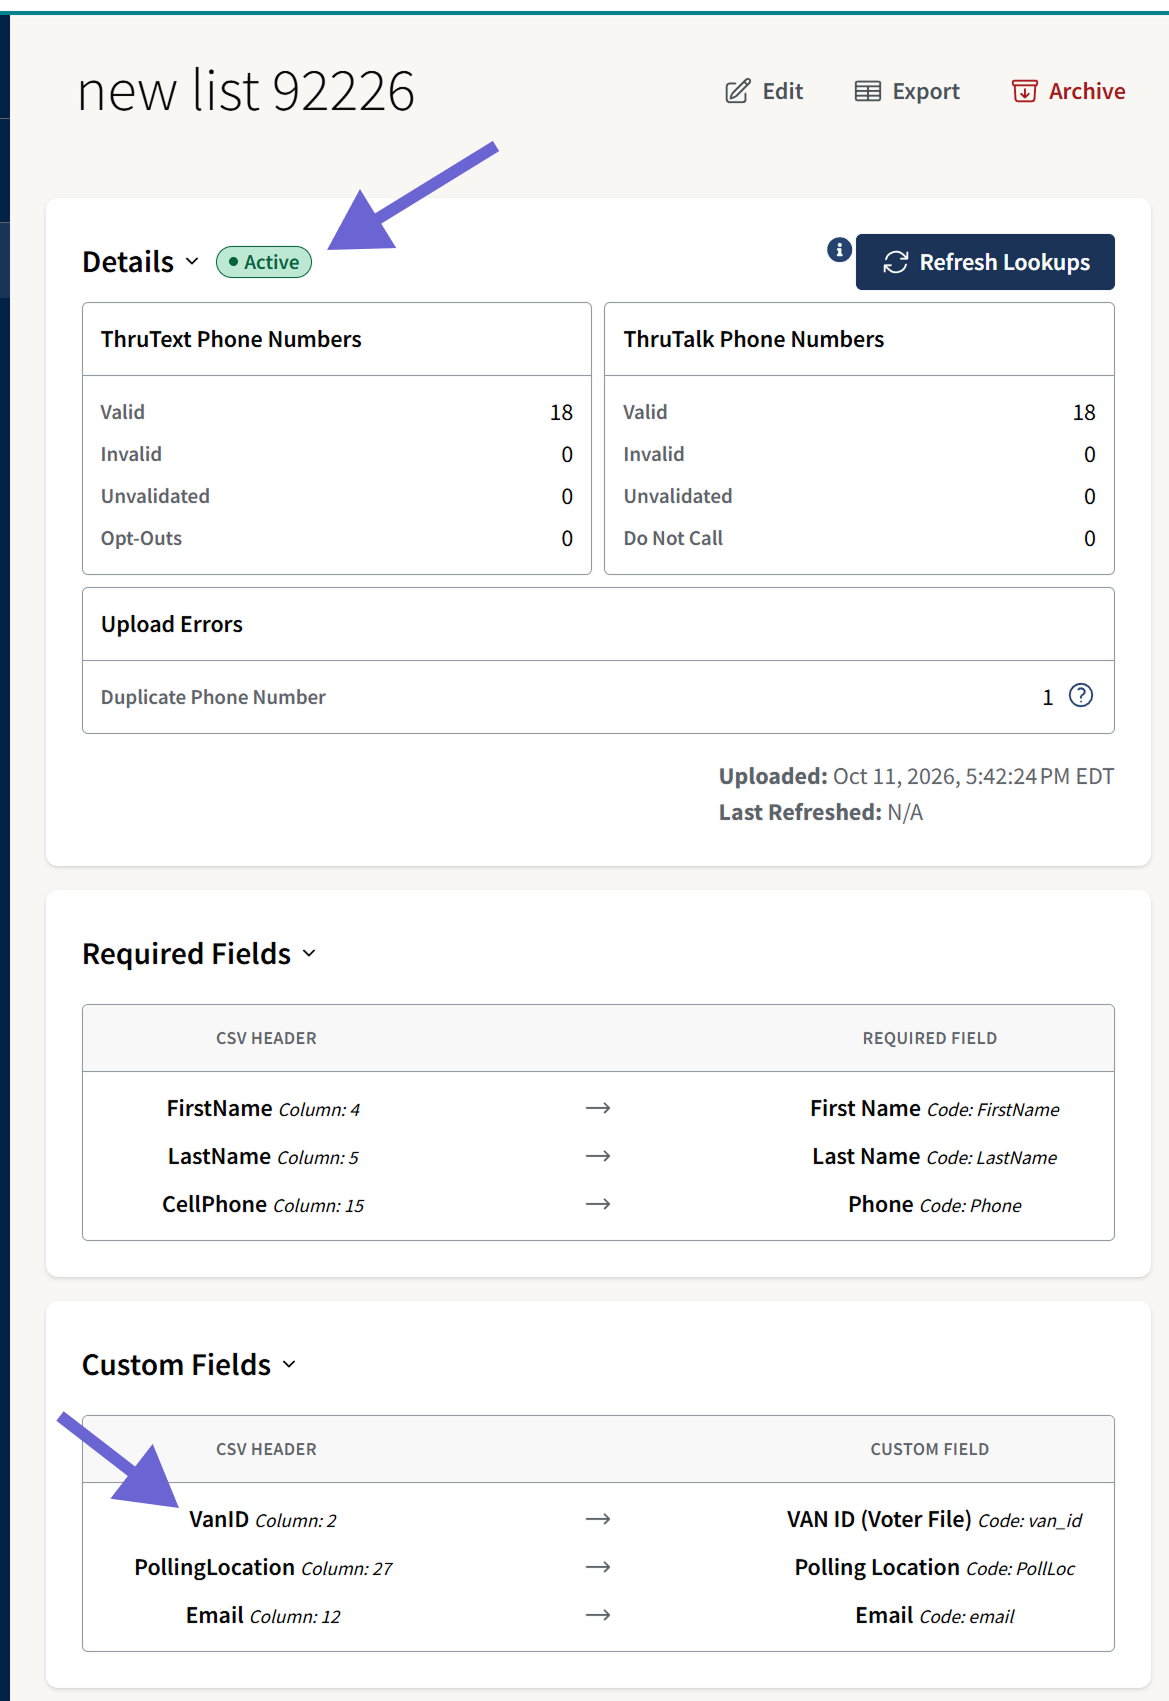
Under Custom Fields, you can also confirm that the appropriate VAN ID was imported.
Once your group is Active, you can review the number of valid contacts, any upload errors, and the field mappings used to create your group. For more information about validation results, upload errors, and managing your group, see our guide on the Group Details Page.
Troubleshooting VAN Import Issues
If you're unable to find your VAN list or your group doesn't contain the contacts you expected, review the following common issues.
- Upload Failed: If your group fails to upload, it could be due to the file size of the CSV. GetThru can handle files up to 45 MB. If your upload fails, try dividing your list using VAN's Split feature.
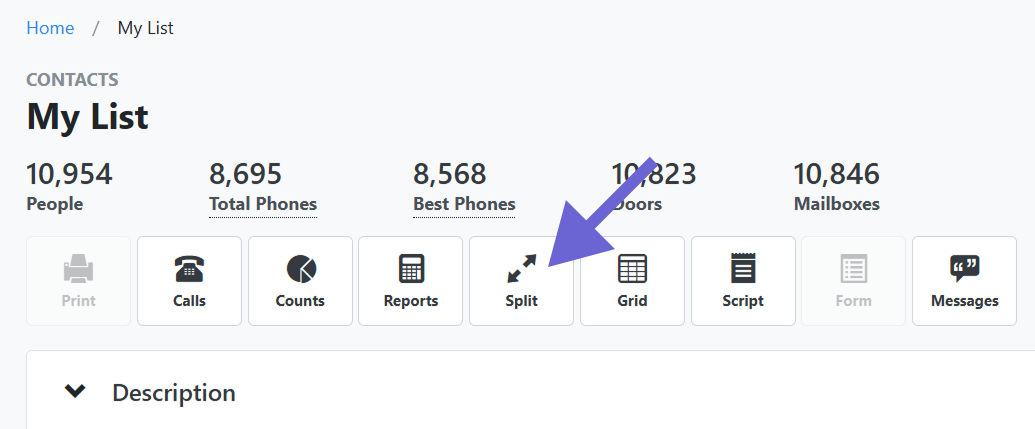
- No Lists Appearing: If you've tried the above and you can't see your list, check the following
- Saved Search: The API can't access a Saved Search, so make sure that you save your list as a Saved List.
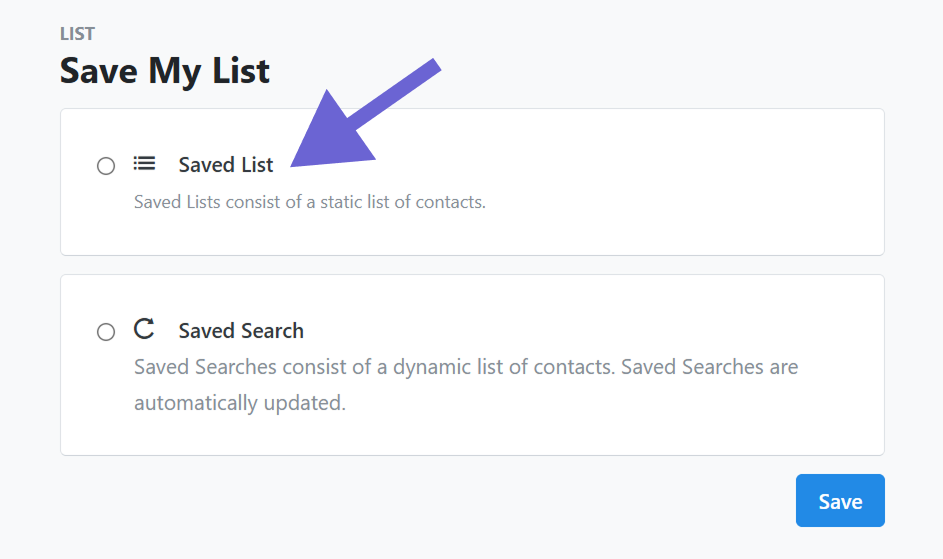
- Folder Permissions: Check that your folder has permissions to be accessed by the API
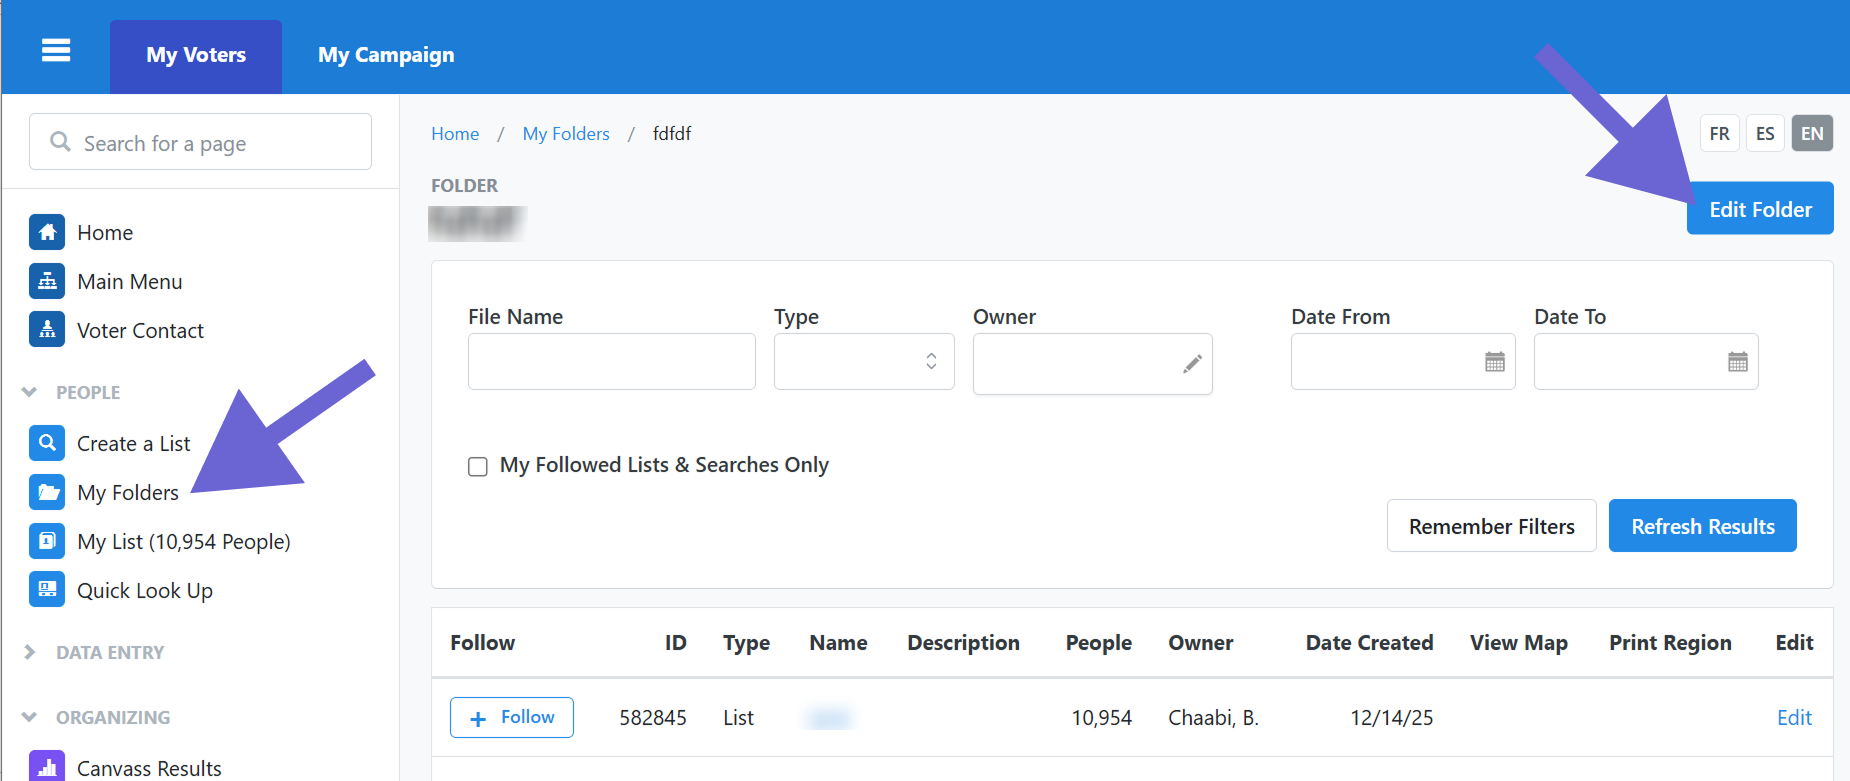
- Saved Search: The API can't access a Saved Search, so make sure that you save your list as a Saved List.
- Your Group Has Fewer Contacts Than Expected: The number of valid contacts in your completed group may be smaller than the number of rows in your saved VAN list. Check the following:
- Required fields: Contacts missing a first name, last name, or phone number are excluded during processing.
- Phone Number Mapping: Confirm that you selected the intended phone number column during Field Mapping.
- Phone Number Validation: Review the validation results and upload errors on the Group Details page.
- VAN List Filters: Confirm that your saved VAN list included the contacts you intended to import.
Additional Information About VAN Lists
- VAN Custom Fields: VAN offers custom data fields that vary by state and committee. However, not every field is available through the VAN API.
If the information you need isn't available when importing a saved VAN list, you can export the list from VAN and upload it as a CSV instead.- First, create the custom fields you want to map. Follow the instructions in this guide: Custom Fields - Personalization and Integrations.
- Next, export the list from VAN. VAN has a helpful guide, which you can access if you're logged in: How do I Export a List?
- Once you have your list as a CSV, click Create New Group in GetThru and upload the CSV.
- Make sure that you map VAN IDs, in addition to the VAN custom fields, or the VAN Integration may not work as expected.
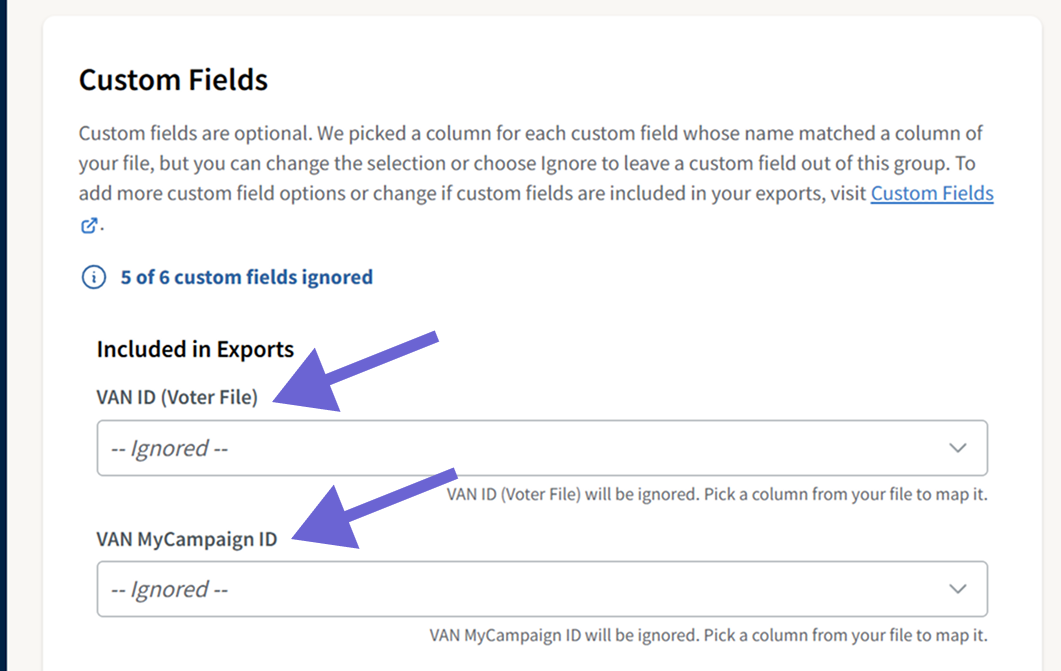
- Inactive Voter Records: As of April 5, 2024, VAN API keys can include inactive voter records in imported lists. If you don't want to include inactive voters, adjust your filters in VAN before saving the list. Under Voter Status, deselect Inactive.
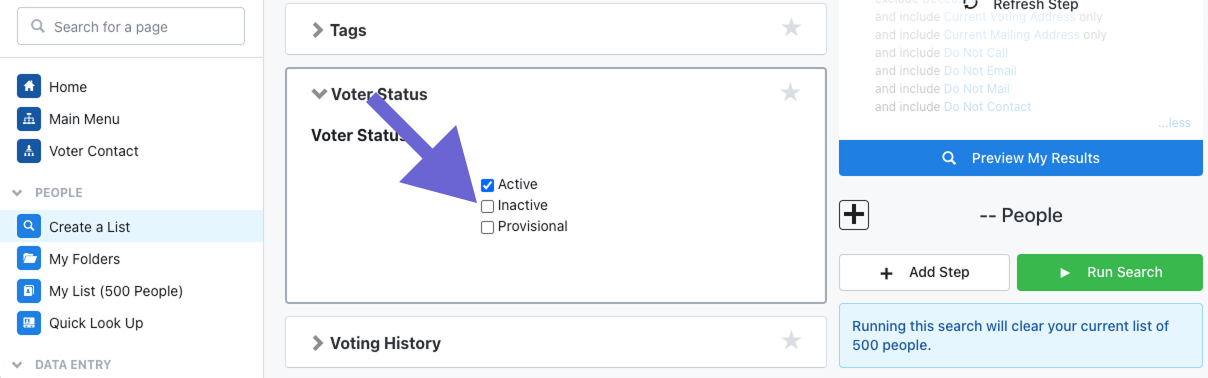 In some states, this filter is called Voter Status and Voter Registration. Available voter statuses and filter options may vary by state and individual VAN user permissions.
If your VAN account doesn't provide access to certain voter statuses, those records may not be included in the saved list available to GetThru.